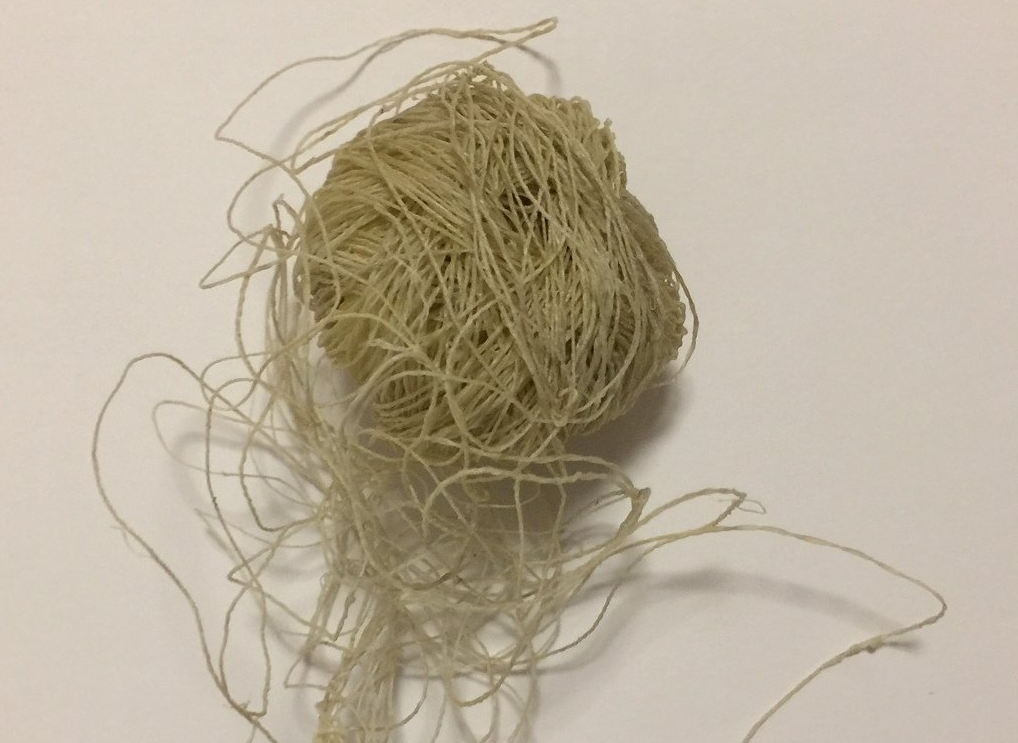
Giddin and sewing
Sewing the y'riot
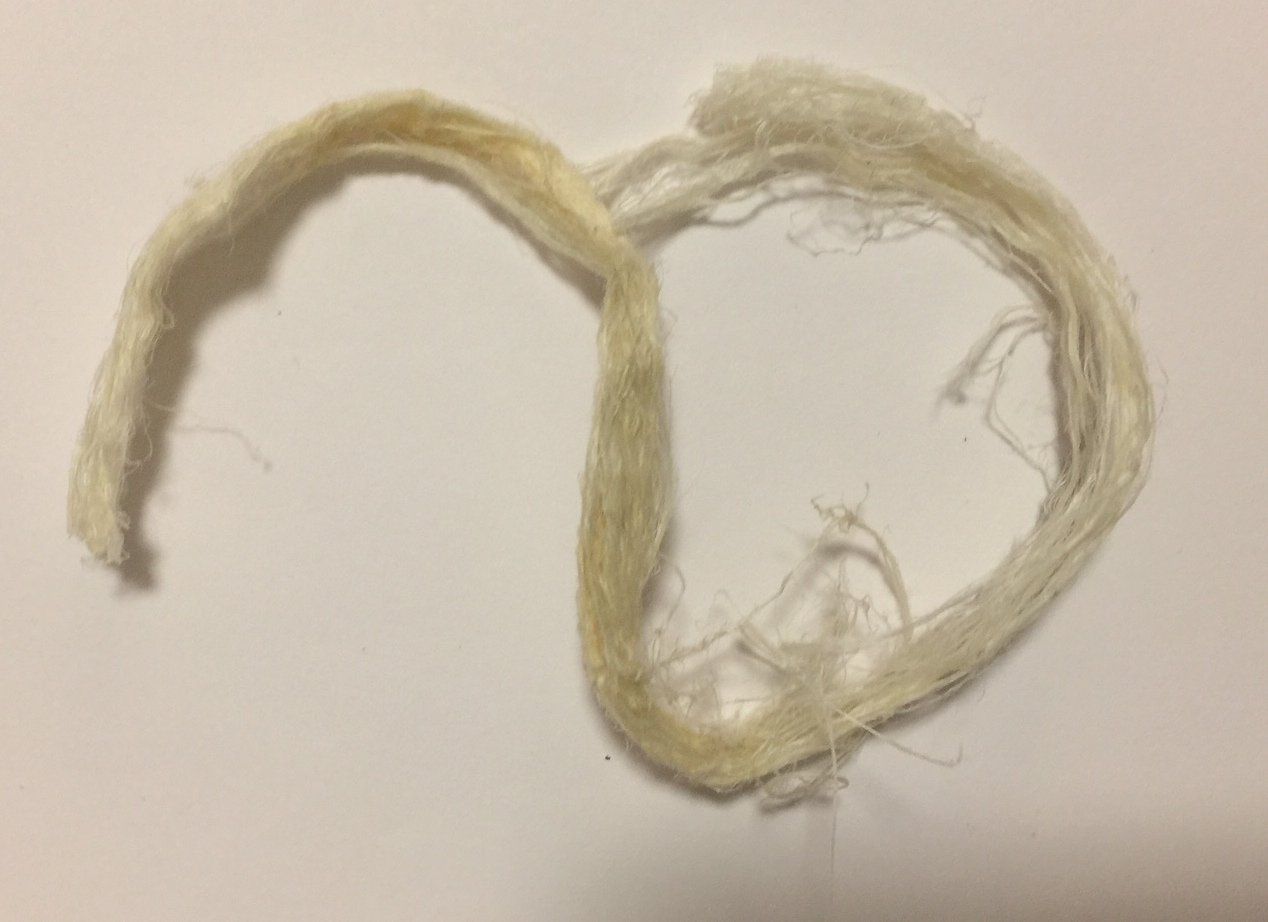
(sheets of parchment) together is done with giddin. These course threads are made from the dried veins of a kasher
animal.
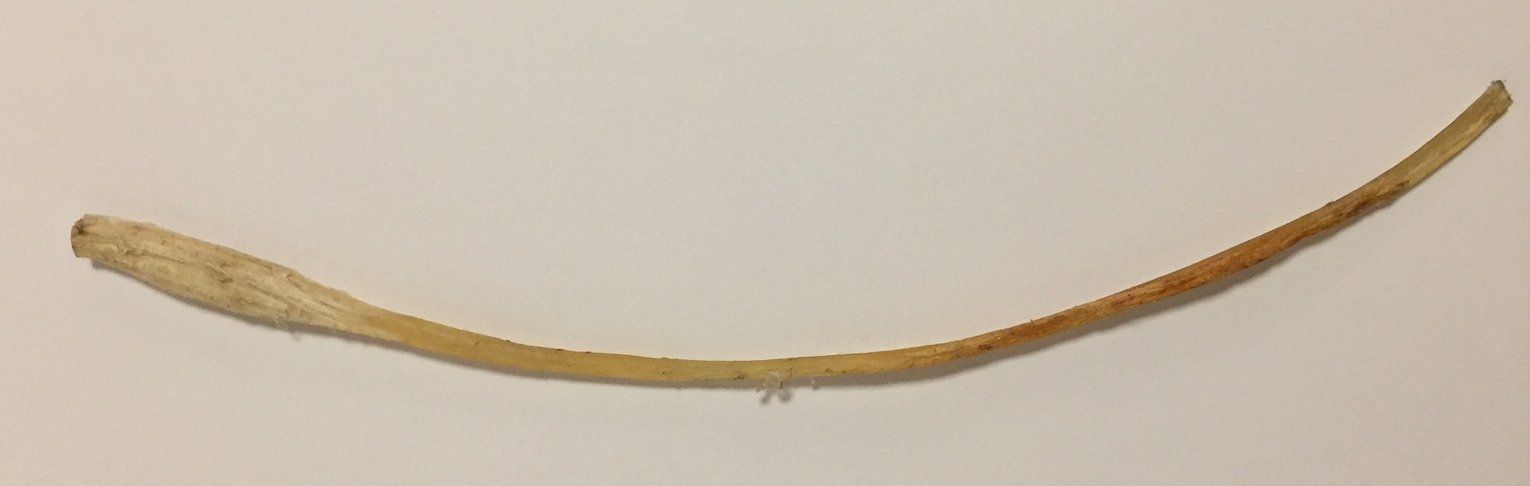
These are usually from the hind quarters (the bit we can’t eat!), but giddin can also be made from tendons taken from the foot muscles. The sinew is extracted then bashed until the threads inside are released. These are then stretched and spun. Its a big secret as to how it is done, practiced by only a few. A single ball of giddin should suffice for a whole Torah.
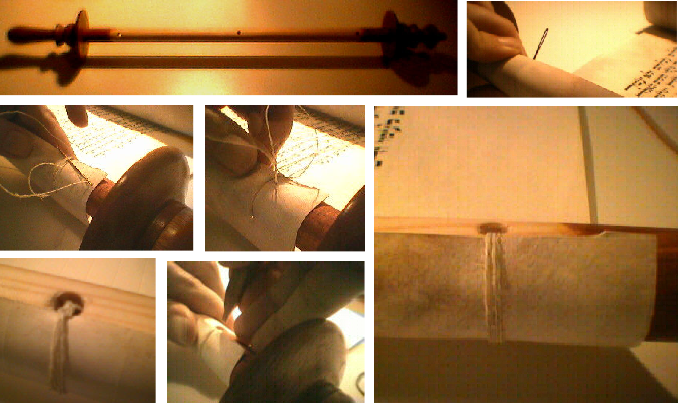
Below photos of the core stages. Photos © Mordechai Pinchas.
Scribes are warned not to sew right up to the very edge of the sheet as this would prevent an element of flexibility when the scrolls are being handled and lead to rips. Over time different styles have developed and one can often date a scroll by the type of sewing technique used.
Oddly enough, sewing is the thing I used to find the most difficult thing to do in sofrut. I did a bit of knitting when I was much younger, but knots and thread and stuff seem to be a bit beyond me. Fortunately my teacher Vivian z”l
was very good at this sort of stuff and his teacher Dr Eric Ray z”l
also prepared a very useful paper which this web page draws heavily on. Over time I got better at it - practice makes perfect.
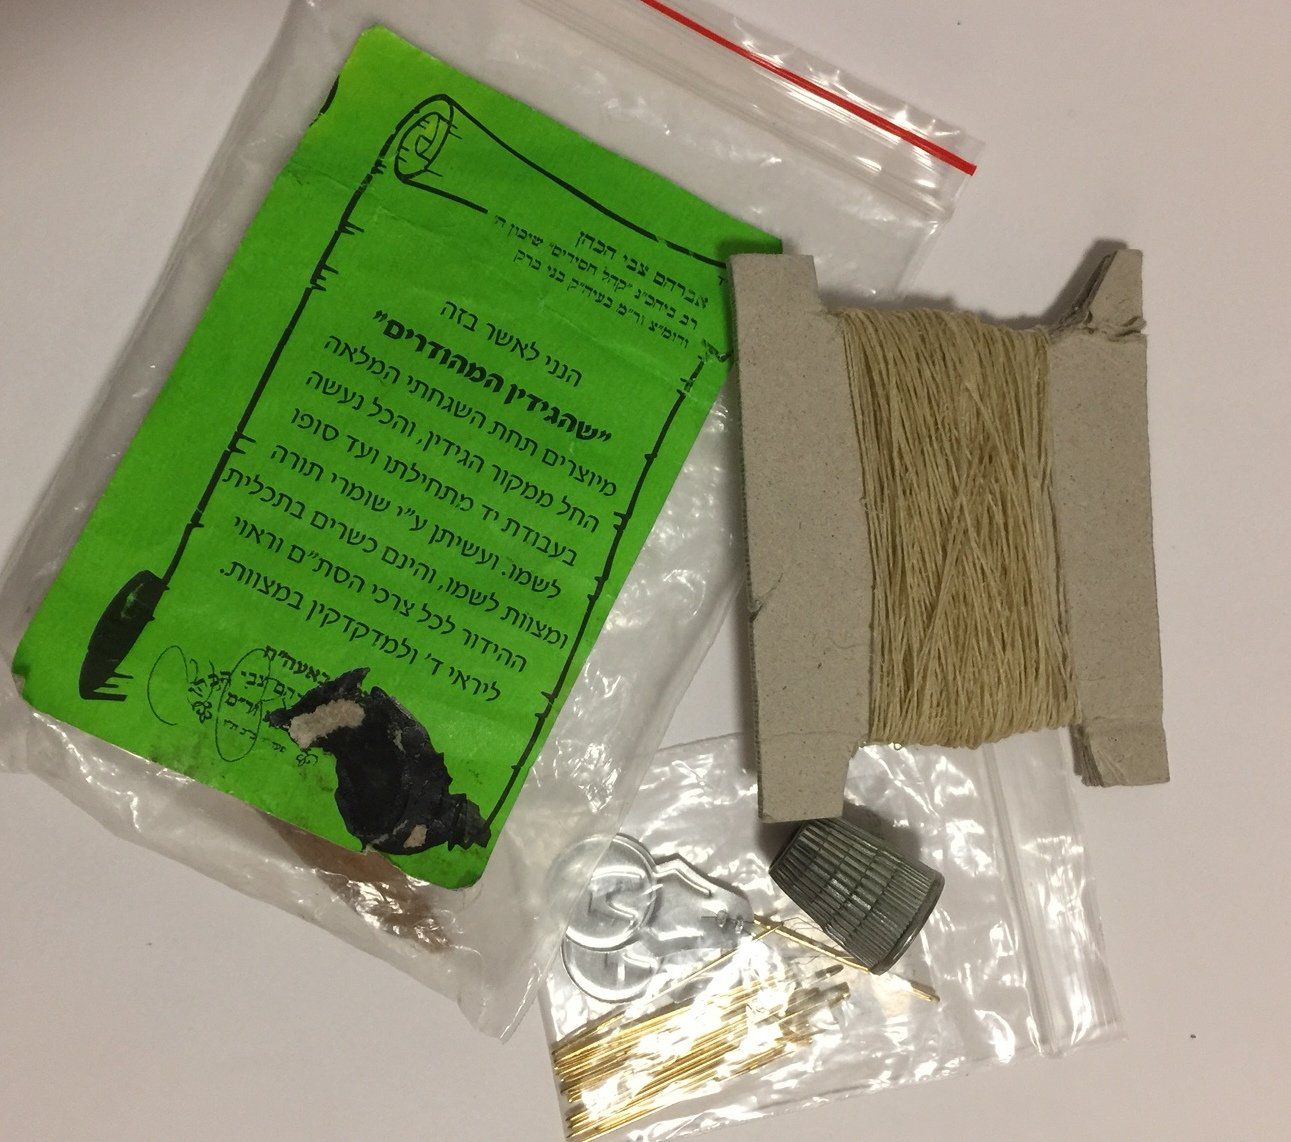
Below some of the tools, gold plated needles a thimble,
giddin and the little pouch I keep it in with suitable
hechsher. Photos © Mordechai Pinchas.
There are two parts to the sewing:
1. Sewing the y'riot (sheets) together and
1. Sewing the y'riot (sheets) together and
2. Sewing the sheets to the atsey chayim
(wooden rollers)
1. SEWING THE Y’RIOT
TOGETHER
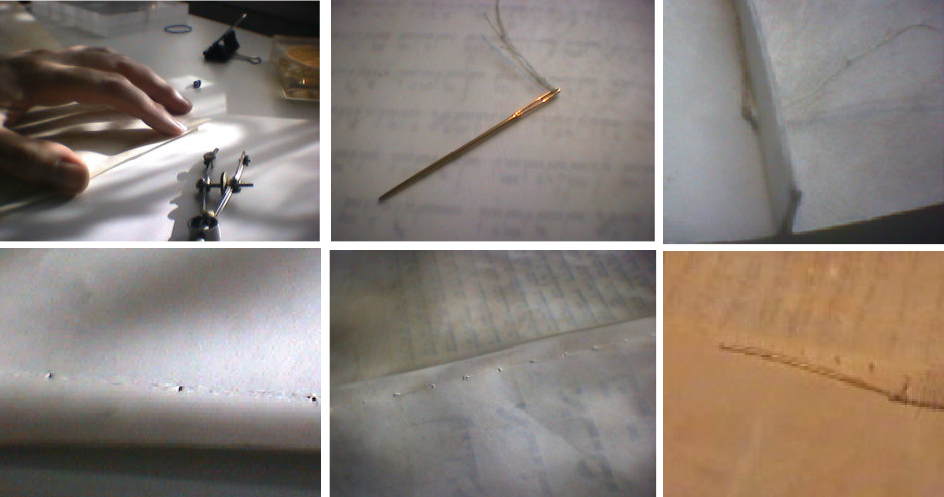
There are basically two methods, one which is known as the ‘blind-stitch’ which has been practiced since around 1800 and one prior to this known as the ‘cross-over stich’. We will concentrate on the former here since that is what is used today, though in repairs to pre-1800 scrolls one would try to match the stitching used. Initially one has to make holes evenly spaced in the tough parchment using a needle (preferably gold plated) starting a little way away from the parchment.
There are basically two methods, one which is known as the ‘blind-stitch’ which has been practiced since around 1800 and one prior to this known as the ‘cross-over stich’. We will concentrate on the former here since that is what is used today, though in repairs to pre-1800 scrolls one would try to match the stitching used. Initially one has to make holes evenly spaced in the tough parchment using a needle (preferably gold plated) starting a little way away from the parchment.
‘Blind-stitching’ folds works by folding the parchment under, so that in the front one, one can just discern stitches going through the fold as the stitching only shows properly from the back. This is why on the two side of any ruled out k’laf
one has to leave an addition c. 8mms onto the margin length to allow for this foldover.
One does not start right at the end of the k’laf but leaves a small gap to allow some give when the k’laf is held open/stretched. The giddin is pushed through the k’laf (this isn’t as easy as it sounds as the material is quite tough so a thimble is helpful). A loop is created, the needles threaded through it and pulled tightly to the right which knots it tightly. This is a ‘sailor-stitch’. The first simple stitch may then be doubled back to strengthen, though this is not absolutely necessary. Similarly the last stitch may also be doubled, or the middle one. This is called ‘prior-stitching’. Otherwise it is ‘simple-stitching’ only visible along the underside of the k’laf because of the fold over. The last stitch loops through the ‘prior-stitching’ twice an pulled tight to knot the giddin securely. The excess giddin is then cut off close to the knot.
Gluing on re-inforcement strips of parchment is an option, however not really necessary for a new work. However on repairs to sewing on old scrolls they can be valuable. They should not be positioned right up to edges either. (remember the glue must be kasher - a synthetic PVA will do if glue made from old k’laf boiled is not available.
Below some of the stages in blind stitching. Photos © Mordechai Pinchas.
The alternative to blind stitching which was the practice is a 'loop stitch'/'cross over stitch'. As mentioned this can help date a scroll and I'm also particular when repairing a Torah to ensure that I match the stitching used.
Below is a video showing loop stitching in practice fixing a Czech scroll from Newcastle © Mordechai Pinchas.
2. SEWING TO THE ATSEY CHAYIM
The shaft on each ets chayim
has three (or four) holes drilled into it (depending on the length) to allow for the giddin
to be thread through attaching the k’laf. The top and bottom holes are approx 2.5-3.5 cms from the top and bottom of the parchment. The edge of the k’laf
should be placed next to the holes. The needle is pushed through the hole and goes through the parchment on the other side. Mostly we will be dealing with 3 holes, so the giddin
is threaded through the hole and traditionally round 4 times. 3 x 4 = 12 symbolising the 12 tribes of Israel. However my teacher thought 5 was stronger so I tend to do that. there aren't really rules here - just minhag
(custom).
Once the first stitch is made, it should be pulled tight wrapping the parchment to the staff. The giddin
is then sewed round a further three or four times and tightened and straightened on each occasion. The needle is then threaded underneath the tightened four stitches creating a loop and then knotted. This is done a further two times creating three knots tightly together. The excess giddin
is snipped off and the knots can be pushed into the hole with a shaped piece of wood making the final work look neat and tidy.
As with the seam sewing, there are alternative methods of sewing on to the rollers though these are much more complex.
Below various stages in sewing the parchment to the
atsey © Mordechai Pinchas.